Meteorgis is used for "georeferencing" of images transmitted by Russian Meteor M2 weather satellites. It doesn't georeference images so that they could be used in GIS. Instead, it overlays country borders etc. over captures and rectifies them. There is one huge problem with Meteorgis. It doesn't really come with proper documentation, as it seems it is supposed to be used in live mode only i.e. while you're decoding images as the satellite passes. However, if you use it to process historic captures, you're essentially out of luck. The program comes with pretty much no documentation at all, and the documentation that comes with it will help you to configure it, but not to actually use it except in live mode.
Prerequisites
You will need:
- Meteorgis
- LRPT Decoder (comes e.g. bundled with the community version of SDR#)
- .s-file of the capture OR decoded non-rectified image in BMP or JPG-format, and .stat and .gcp-files (generated by LRPT Decoder)
Phase 1 - Configure LRPT decoder
Assuming you have set up Meteorgis, and you want to process some old captures, you will need a gcp-file (ground control points), which is essentially a file that contains coordinates for every tenth pixel in every tenth line of the capture. If you have a .gcp-file already, jump to phase 3
LRPT decoder is responsible for creating the .gcp-file, so if you haven't configured LRPT decoder to produce .gcp-files, and you no longer have an .s-file or baseband of the capture, you are out of luck unless you're able to produce a .gcp-file manually using a historic TLE and SGP4 satellite library (please don't ask me how). While Meteorgis's "documentation" implies it can process s-files directly, I've never been able to do that, and I've even reverse engineered Meteorgis to see how it tries to process them. Assuming you have a .s-file, but you don't have a gcp-file, you have re-decode your capture with LRPT Decoder. LRPT Decoder creates a .gcp-file when you include [GEO] section in its configuration file. I have created a separate .ini-file for this task called "M2_LRPT_Decoder_georef.ini". The file I've copied below is for Meteor M2. If you process M2-2 files, you have to state that sat=M2-2 and mode=80k.
	[IN]
	source=man
	sat=M2
	mode=72k

	[OUT]
	rgb=122.jpg
	rgb_q=100
	mono=yes
	logs=no
	APID70=no
	VCDU=no
	path=C:\SDRSharp\M2 Images

	[GEO]
	RoughStartTimeUTC=5.9.2020
	TleFileName=C:\SDRSharp\LRPTdecoder\M2_tle.txt
	Alfa_M2=110.8
	Delta_M2=32
	Alfa_M22=110.0
	Delta_M22=-4.8

	[FAST]
	FORMAT=jpg
	R=1
	G=2
	B=2
You have to:
- Revise "path" so that it points to the folder where your decoded images are stored.
- Revise rgb and R, G, and B parameters if you want to use e.g. 123 profile.
- Set TleFileName to point to a tle file that contains nothing but the TLE information, that is three lines of text, of Meteor M2 valid on the day of the capture i.e. if your capture is from 5 September 2020 you can't use a TLE that is newer than the day of capture e.g. 6th of September, and you probably can't use a TLE that was issued on 28 August 2020 either, because it is too old (I'm not sure about this though). A TLE issued on the 3rd or 4th of September probably works. If you don't happend to have a TLE for the data of the capture, you can download it from Space-Track.org (registration required). An example of a valid TLE file is shown below. Just make sure that you put the TLE file in the folder you specified in the .ini-file and that it has the same name.
M2_tle.txt
METEOR-M 2
	1 40069U 14037A   20255.53725836 -.00000023  00000-0  86328-5 0  9995
	2 40069  98.4962 289.7908 0006525  41.1467 319.0202 14.20675116320435
- Set RoughStartTimeUTC parameter. It needs to be set to the date of the capture, and I think it is locale dependent i.e. 5 September 2020 could be 9-5-2020, 9/5/2020, 5/9/2020 etc. Regardless of the locale, you have to omit leading zeros.
- Copy SGP4.dll from Meteorgis\file_to_put_in_M2_LRPT_Decoder_folder\ folder to root of LRPT decoder folder.
Phase 2 - Decoding of the .s-file
Now that you have created and/or updated the .ini-file, you can launch LRPT decoder. I have created a separate BAT file called "run - offline.bat" and shown below for this purpose. The BAT-file goes in your LRPT decoder folder. Revise the name of the .ini-file if you named yours something else.
START M2_LRPT_Decoder.exe M2_LRPT_Decoder_georef.ini
When LRPT decoder is running, click on the "72k" button to load the .s-file. When decoding starts you should see "GEOGRID will be calculated" in the bottom left corner. If you don't see it, you probably loaded wrong .ini-file or you forgot to copy SGP4.dll to roof of LRPT decoder folder. LRPT Decoder should look like similar to the screenshot below.

LRPT decoder running with GEOGRID Calculation enabled.
Assuming you see "GEOGRID will be calculated", you might want to test that geogrid calculation (i.e. creation of .gcp-file) actually works. This is not mandatory, but may save you a couple minutes if something is wrong. In order to test that calculation works, you must wait until a couple lines have been decoded, and then click "Generate RGB" or "122.jpg" (or "123.png or whatever profile you're using). Either you will see "GEOGRID: calculation nnn" where nnn is incrementing numbers or you will see "Error: TLE not found". If you do see GEOGRID calcuation text, you should close LRPT decoder and start all over. This will only take 10 seconds or so. If you don't restart, you'll probably end up with a corrupt .gcp-file. If you got the "TLE not foun error", refer to "Typical issues" section at the end of this page. When it works, it should look like this:
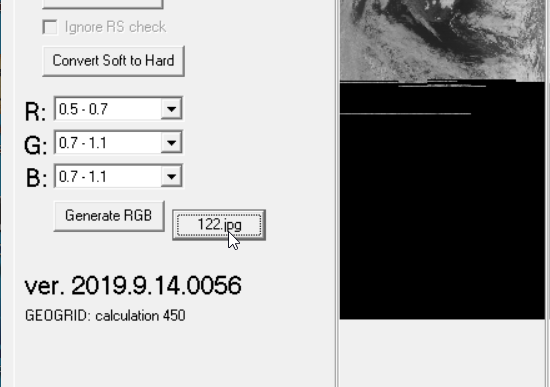
GEOGRID Calculation in progress.
Now that the .s-file is decoding (and you may have tested that calculation works), let LRPT decoder finish decoding. Once the file has been decoded you have two options. Either you click on "122.jpg" or you click on "Generate RGB". If you click on "122.jpg" LRPT decoder will save a composite capture in jpg format and a .gcp-file to the folder you specified in the .ini-file above. If you click on "Generate RGB" LRPT decoder will show you a preview of the capture. Preview window has options to either "save" as a composite jpg or individual APIDs and a composite in bitmap format, and "statistics". First save the capture in either format (chosee bitmaps if you want Meteorgis to fill in missing lines or use rainfall or thermal etc. features of Meteorgis that I've never tried). Regardless of which format you choose, LRPT decoder will not automatically create a .gcp-file. To generate the .gcp-file, you must click "statistics" and then select and copy all numbers from the right hand side of the statistics window, and paste these in Notepad++ or some other text editor, and save them in the same folder as the capture file (you can use any file name at this point). Statistics window looks like this:
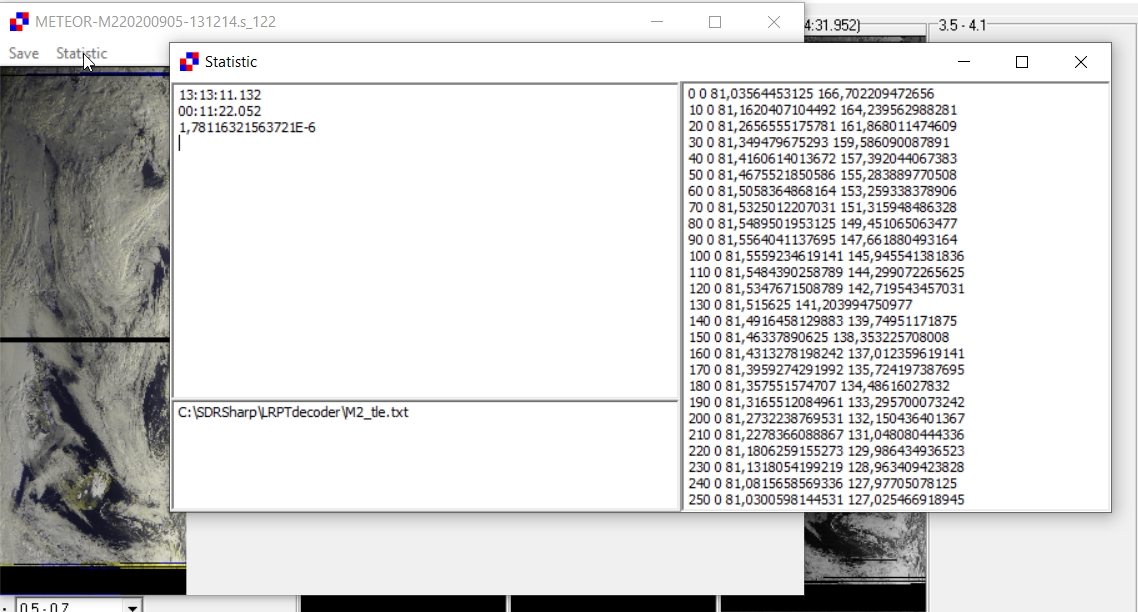
Contents of LRPT decoder status window.
Phase 3 - Meteorgis
Now the .s-file has been processed and it is time to move on to Meteorgis. Meteorgis interprets the time of capture from file name, so before the capture can be processed with Meteorgis, you must ensure that the capture file is named so that Meteorgis understands it. You must ensure that all files that are needed by Meteorgis are renamed. Meteorgis needs the bmp/jpg, stat, and .gcp-files. Before you start renaming files, open the .stat file. The first row contains the start time of the capture in local time zone. You will need it, so keep the file open. A .stat-file looks like this:
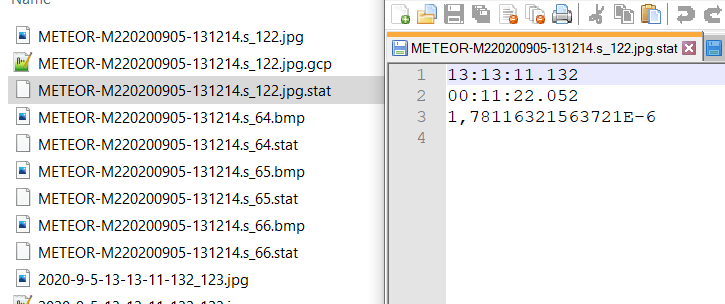
Contents of a .stat-file.
Now you can start renaming files. The correct format is year-month-day-hours-minutes-split secods_color profile. You must omit any leading zeros from month, day and time. Also, note that hours are in 24h format. So as an example, capture starting on 5 September 2020 at 13:13:11.132 in 123 color profile (although afaik, it doesn't matter if your capture is in 122 format and your file name says 123) is renamed as 2020-9-5-13-13-11-132_123.jpg. Other files must be named the same way. Note that the file name must have .jpg before the actual suffix. After you've renamed your files, you're finally ready to fire up Meteorgis.

Naming of files.
Assuming you've made it this far this will be the easy part. Open command prompt (windows button + r, type cmd) and cd into the Meteorgis folder. When you're in the Meteorgis folder, type
Meteorgis /sat:M2 /nolive /input:"c:\path\to\capture\folder\capture_file_name"
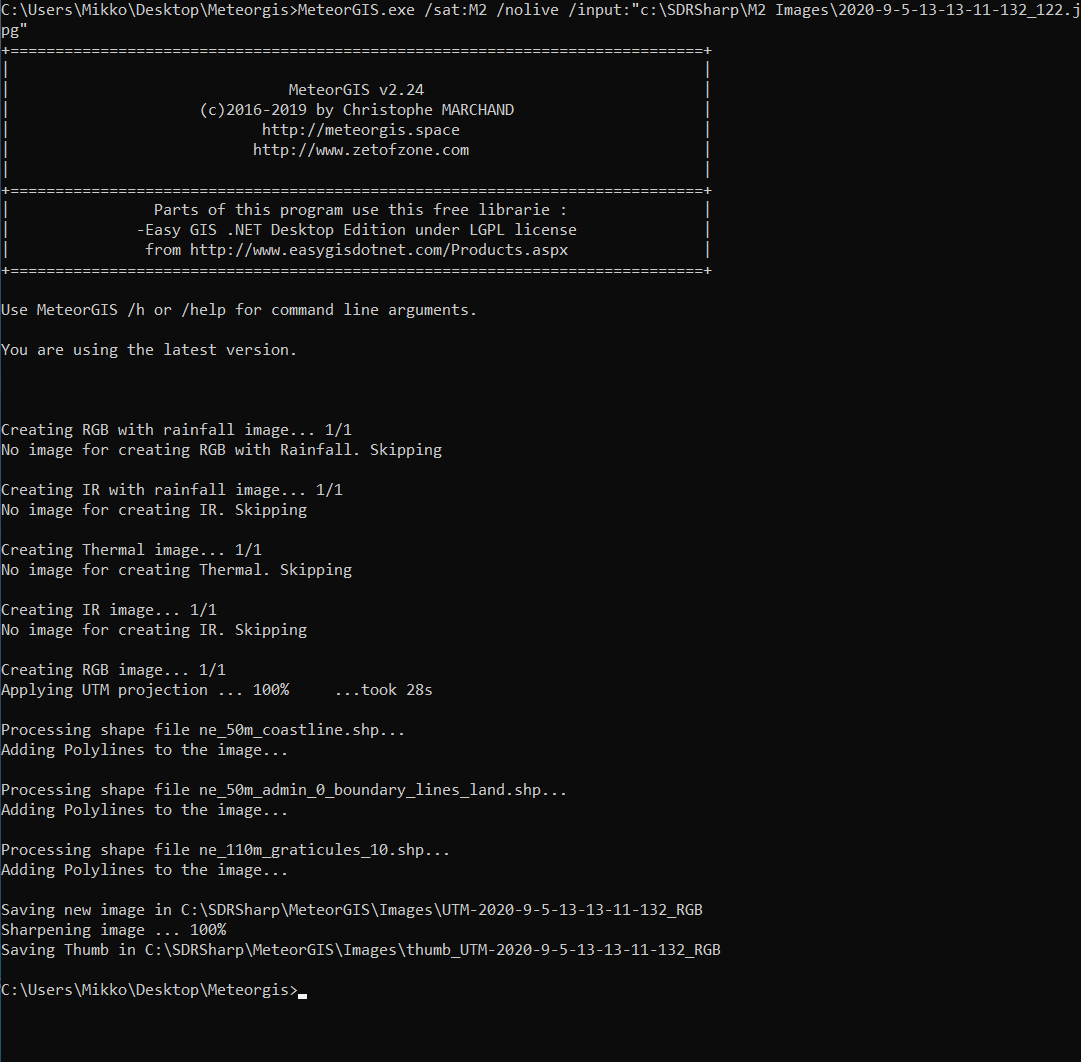
Meteorgis upon successful processing.
Note that you must put double quotes around input file name. If you want to process bmps, just use one of the bmp files as input. Meteorgis will figure out names of other channels, but you must still rename them "correctly" (and .gcp-file must be named .jpg.gcp). Now it is time to launch Meteorgis, so hit enter and cross your fingers. If everything works, you should see something similar to the image above, and you can navigate to Meteorgis images folder and see the result. If Meteorgis fails check out the "Typical issues" section below. I pretty much only use Meteorgis when I have a capture that may or may not include North pole. I use Meteorgis to verify that I actually saw the pole.
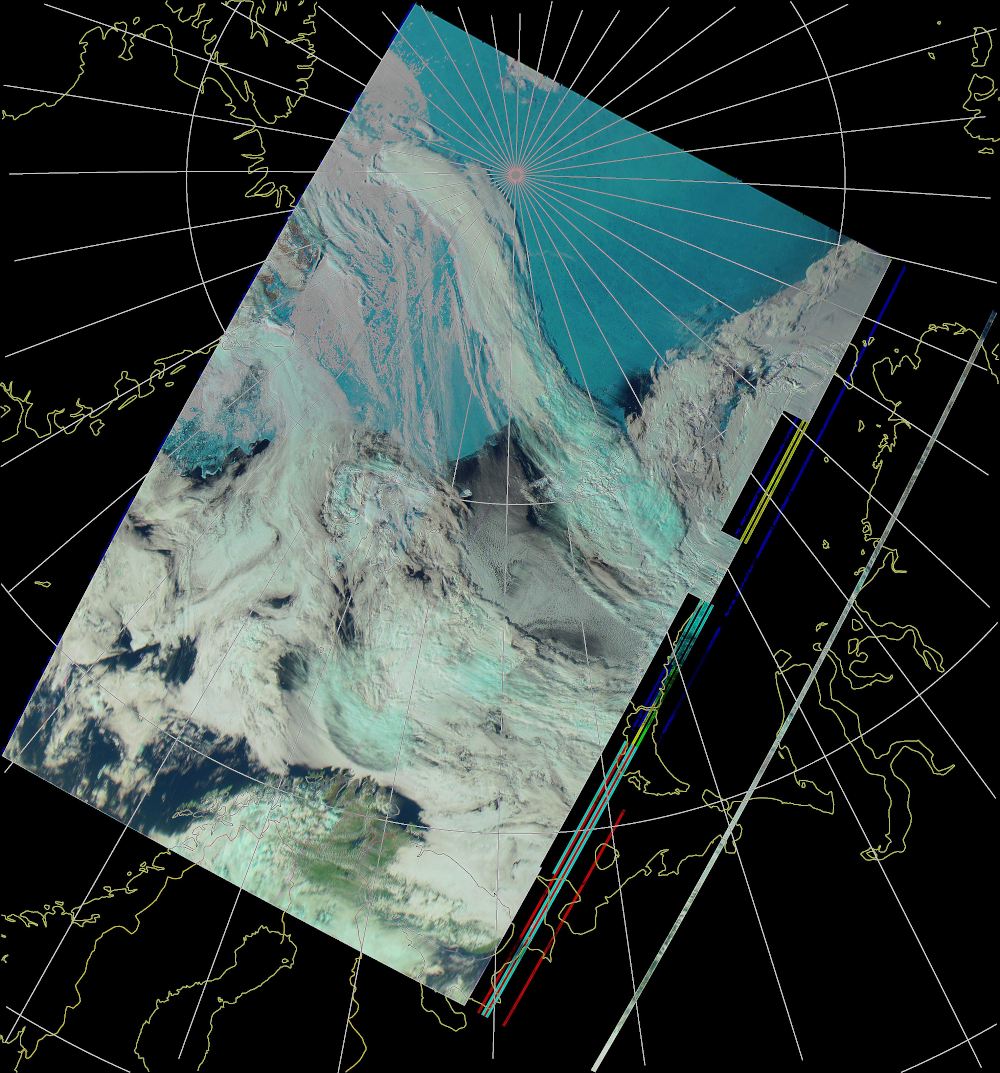
Yep, that's North Pole.
Typical issues
I have had the following issues:
- Meteorgis doesn't like spaces in filenames and paths. Put everything in folders that don't have spaces in them.
- LRPT Decoder "Error: TLE not found": a) you forgot to change RoughStartTimeUTC parameter in LRPT Decoder ini file, b) TLE is too old or newer than the capture, or c) Meteorgis is really unable to find the TLE file. You can see which TLE it uses if you click on "Generate RGB" and click on "statistics". If these are wrong, fix the .ini-file or make sure that you specified the correct .ini-file in your bat-file. If the path to TLE and the TLE file name are valid, your TLE is likely too old or newer than the capture. To fix this, obtain a TLE from the day of the capture from Space-track.org. You can easily overwrite your TLE if you run Meteorgis without any parameters, as Meteorgis always refreshes the TLE file when it is used without any parameters i.e. in live mode.
- Meteorgis crashes and complains "Error : Index was outside the bounds of the array". This probably means that either you are processing BMP-files and one of the files is longer/shorter than others. Fix this by editing longer file(s) e.g. in Gimp by removing lines that are not present in the shortest file(s). If you're processing a jpg or all three BMP files are equal in terms of length, your .gcp-file is likely corrupt. Open the gcp-file in Notepad++. First two columns represent x and y values in the image file. Just scroll through the file and search for any discrepancies. I have seen the y value starting over in the middle of the file. If this happens, re-process the .s-file to obtain a new .gcp-file.
- Meteorgis crashes for some other reason. Meteorgis processes non-rectified images only. If you tried to process a rectified image, use a non-rectified image instead.
Check out some of my weather satellite captures over here.